Configure VNCServer on Oracle Solaris 11

Now that I have a freshly-installed Oracle Solaris 11 server, I need to be able to remotely run and access installation media/menus that have graphical elements (GUI). One of the best ways to do this is via a VNC connection, where the installers will run on the server itself, and only the output is sent to the client/remote PC over the network, as this will mitigate latency issues that could be faced if running the installer itself remotely.

In Oracle Solaris 11, as the default out-of-the-box installation is a text-based installation with minimal packages configured (unless you opt for a virtual machine image-based installation), this means that the required packages will need to be installed and configured first, before running the VNCserver on your Oracle Solaris server.

If you were to try starting a VNC server, this is what you would expect to see currently:

root@sc2:~# vncserver :1
-bash: vncserver: command not found

To start off, first we will need to connect the Oracle Solaris server to the internet, in order to access Oracle’s package repository (the default repository  that comes pre-configured during the installation of the operating system). Of course, you could also use a custom repository hosted on a machine within your local network, but in this case I will be accessing Oracle’s package servers directly.

So, lets have a look at the current state of my internet connection, by doing a few simple tests, while connected as the root user
NOTE: Several significant changes in the way the networking (consisting of the hardware, device,  network later and interface layers) works in Oracle Solaris 11 might be worth looking through first, before messing about in-depth with your network settings.

Let’s have a look at the datalink layer, using the dladm and ipadm commands..

root@sc2:~# dladm show-link
LINK          CLASS     MTU    STATE       OVER
net1             phys        1500     unknown   —
net0            phys        1500      up               —

Current datalinks that are active, net0 and net1 for my two interfaces (or are they?)

root@sc2:~# dladm show-phys
LINK           MEDIA                STATE        SPEED  DUPLEX    DEVICE
net1              Ethernet             unknown    0             unknown    e1000g1
net0             Ethernet             up                 1000      full               e1000g0

The ‘show-phys’ option shows me a bit more detail, and does confirm that the datalinks belong to two separate devices, the network interfaces e1000g0 and e1000g1 respectively. But as can be seen, the net1 link belonging to the device e1000g1 is currently in an unknown state, as it has not been configured during my installation. Let’s first fix this (though in truth it is not strictly necessary for setting up VNCserver, and is more for completeness).

root@sc2:~# ipadm show-if
IFNAME     CLASS        STATE    ACTIVE  OVER
lo0                loopback   ok             yes            —
net0             ip                ok             yes             —

Here I can see what appears to be only the first network device and the loopback adapter currently being assigned IP addresses on my server.

root@sc2:~# ipadm show-addr
ADDROBJ           TYPE          STATE       ADDR
lo0/v4                   static          ok                127.0.0.1/8
net0/v4                static          ok                192.168.0.66/24
lo0/v6                  static          ok                ::1/128
net0/v6                addrconf   ok                fe80::250:56ff:feb4:26/10

This output confirms it, there is currently no IP address assigned to my second network device, the e1000g0 physical device that is utilizing the net1 datalink.

At this point, first I’d like to add the IP address found in my hosts file for the private interconnect (marked as sc1-priv and sc2-priv respectively in my /etc/hosts file) before proceeding further.

root@sc2:~# ipadm create-ip net1

root@sc2:~# ipadm  show-if
IFNAME     CLASS       STATE    ACTIVE     OVER
lo0                loopback   ok            yes              —
net0             ip                ok            yes              —
net1              ip                down      no               —

Now I will assign an IP address to the net1 interface, create an address object for this IP address, and activate it. Once this is done, a conventional ifconfig command will allow me to ping this IP address, and the name resolution via my /etc/hosts file should also work.

root@sc2:~# ipadm create-addr -T static -a local=10.10.10.66/24 net1/v4static

root@sc2:~# ipadm up-addr net1/v4static

root@sc2:~# ifconfig net1 net1: flags=1000843<UP,BROADCAST,RUNNING,MULTICAST,IPv4> mtu 1500 index 3         inet 10.10.10.66 netmask ffffff00 broadcast 10.10.10.255         ether 0:50:56:b4:0:27
Now, moving on, I need to connect to the Oracle Solaris repository, and download the necessary files for the VNCserver.

First, let’s run a few simple commands to check on the name resolution and IP addresses:

root@sc2:~# more /etc/resolv.conf
# Copyright (c) 2012, Oracle and/or its affiliates. All rights reserved. # #
# _AUTOGENERATED_FROM_SMF_V1_
# WARNING: THIS FILE GENERATED FROM SMF DATA.
#   DO NOT EDIT THIS FILE.  EDITS WILL BE LOST.
# See resolv.conf(4) for details.
search  WirelessAP
nameserver      192.168.0.1
nameserver      192.168.0.20

root@sc2:~# more /etc/hosts
# Copyright 2009 Sun Microsystems, Inc.  All rights reserved.
# Use is subject to license terms.
# Internet host table
::1 sc2 localhost
127.0.0.1 sc2 localhost loghost
192.168.0.66    sc2
192.168.0.65    sc1
10.10.10.65      sc1-priv
10.10.10.66      sc2-priv

I have a DNS server running on a Windows Server 2008 machine, and I’ve created an entry in both the forward and reverse lookup zones for this Oracle Solaris 11 machine on it (not shown here). Now I just need to ensure that I am able to connect to the correct domain and perform a few simple lookups for the IP addresses in my /etc/hosts files.

Let me first configure the correct DNS settings on for the DNS client service (the DNS server is located at IP 192.168.0.20, and the domain is MYDOMAIN.LOCAL, edit this as required):

root@sc2:~# svcs | grep -i dns online         Feb_09   svc:/network/dns/client:default

root@sc2:~# svccfg -s network/dns/client
svc:/network/dns/client> setprop config/search = astring: (“mydomain.local”) svc:/network/dns/client> setprop config/nameserver = net_address: (192.168.0.20) svc:/network/dns/client> select network/dns/client:default svc:/network/dns/client:default> refresh svc:/network/dns/client:default> quit

Check the values of the /etc/resolv.conf file to ensure that the changes above have been applied:

root@sc2:~# more /etc/resolv.conf
# # Copyright (c) 2012, Oracle and/or its affiliates. All rights reserved. #
# # _AUTOGENERATED_FROM_SMF_V1_ # # WARNING: THIS FILE GENERATED FROM SMF DATA. #   DO NOT EDIT THIS FILE.  EDITS WILL BE LOST.
# See resolv.conf(4) for details.
search  mydomain.local
nameserver      192.168.0.20

Next check and configure the default routing tables on my Oracle Solaris server and ensure that it is able to connect to the internet:

root@sc2:~# netstat -rn

Routing Table:IPv4
Destination        Gateway                Flags      Ref   Use        Interface
127.0.0.1            127.0.0.1                UH          2       306       lo0
192.168.0.0       192.168.0.66         U             6       2977     net0
10.10.10.0          10.10.10.66           U             2       0            net1

Routing Table: IPv6
Destination/Mask            Gateway                                Flags    Ref    Use             If
::1                                         ::1                                           UH        2        30              lo0
fe80::/10                            fe80::250:56ff:feb4:22      U           2       0                 net0

root@sc2:~# route -p add default 192.168.0.1
add net default: gateway 192.168.0.1
add persistent net default: gateway 192.168.0.1

root@sc12:~# ping google.com
google.com is alive

After all the preliminary work has been done, now I can connect to Oracle’s Solaris 11 repository and install the solaris-desktop package (and any associated dependencies) in order to start my VNCserver:

root@sc2:~# pkg publisher -P
PUBLISHER                   TYPE     STATUS    URI
solaris                               origin    online        http://pkg.oracle.com/solaris/release/

root@sc1:/# pkg install solaris-desktop
Creating Plan –
Packages to install: 358
Create boot environment:  No
Create backup boot environment: Yes
Services to change:  13

DOWNLOAD                                  PKGS       FILES               XFER (MB) Completed                                       358/358  52154/52154  534.6/534.6

PHASE                                        ACTIONS
Install Phase                             84080/84080

PHASE                                            ITEMS
Package State Update Phase      358/358
Image State Update Phase          2/2

Finally, we need to ensure that the ‘xauth’ file is included in the current PATH (to ensure that the OS is able to find the location of this file by default). This is easily done by editing the .profile or .bash_profile settings for the PATH environment variable, as shown below:

PATH=$PATH:/usr/X11/bin
export PATH

And we can start the VNCserver process as shown below (remember the password that is specified in order to connect to this VNCserver process later on)

root@sc2:~# vncserver :1

You will require a password to access your desktops.
Password: Verify:
New ‘sc2:1 (root)’ desktop is sc2:1

Creating default startup script /root/.vnc/xstartup
Starting applications specified in /root/.vnc/xstartup
Log file is /root/.vnc/sc2:1.log

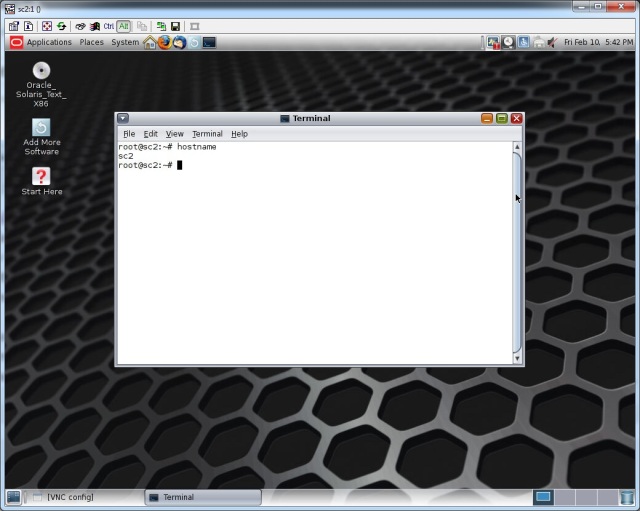
And now we are able to connect remotely via a VNC viewer/client software (such as the freeware TightVNC viewer) to our Oracle Solaris 11 machine, and run whatever graphical management tools/installers we would like over the network

Posted in Configure VNCserver, Install packages | Tagged , , , | 4 Comments

Installing Oracle Solaris 11

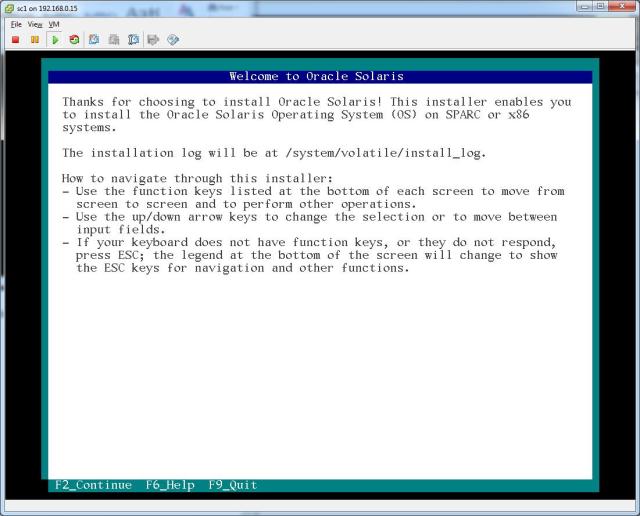
The latest version of Oracle’s new enterprise-class operating system, Solaris 11, has been available for some time now, and I finally decided to get around giving it a try. First off, obtain the installation media (in my case for the x86-64-bit architecture), from here. Currently, only text-based installation media is available, for both the x86 and SPARC architectures.

I will be using a virtual machine on my existing VMWare ESX server to try out this installation, the only notable features would be allocating 4 Gb of physical RAM, 2 CPUs, and 2 network interfaces defined.

When starting the installation, you will be greeted with a text screen, where the installation media does the standard hardware/interface scan before beginning the process.

The first step in the process is the keyboard layout selection screen, where I will select the default  region and language, US English, followed by the language selection


We will next have to specify what software we wish to install, whether just the default operating system, or additional drivers if necessary. Here I will just proceed with the Oracle Solaris 11 installation, with no additional software.

Next the installer selects the disk on which to install Oracle Solaris, as well as any specific partition that has been defined on that disk. As I will be doing a fresh install on a server with a single, 30Gb disk, I can just proceed with the default options here.

Also notice that starting with Solaris 11, the root filesystem containing all the operating system files is placed on a partition formatted with the ZFS (Zettabyte file system) by default, and this cannot be changed during the installation.

When selecting the networking options, I’ve specified a hostname of sc1, and indicated that I want to manually set the settings for the network interfaces on this server.

This machine has 2 network interfaces installed, indicated as interface e1000g0 (net0) and e1000g1 (net1) respectively. Here I will select the first device to configure, I’ve selected the IP address 192.168.0.65, with a subnet mask of 255.255.255.0.

I will also be asked to provide my localization/region information, specifying the location the server is located (region and country), as well as selecting the current local time (some screens are not shown here for brevity). All of this is very straightforward, just provide the info based on where you are located.

The root user is the default user that will be created during installation, here we will need to provide the password for this user. Unlike previous releases of Solaris, Oracle Solaris 11 will enforce some minimal requirements for password strength (a password made of entirely of alphabets is no longer accepted, for example).

If you require, you may also create additional users at this point

Finally, we are presented with a installation summary, detailing all the options that were selected thus far. If necessary, we are still able to go back at this point and make any changes. Once everything is verified, all that’s left is to click on the F2 button to install the operating system.

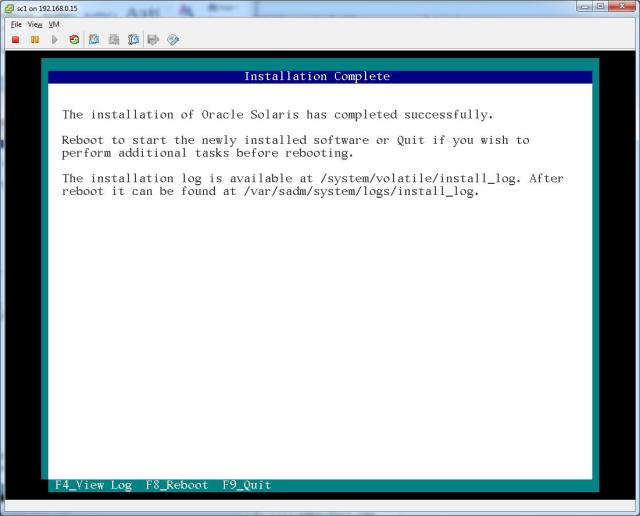
Once the installation is complete (progress screens not shown here), we are presented with a completion screen, and hopefully no errors/issues that need to be resolved. In any case, the installation log location is also shown, for any troubleshooting that may be needed.

And that’s it, we now have a fully functional Oracle Solaris 11 installation. Of course, this is just a vanilla installation, and there will still be packages/privileges/services/users that have to be set up, based on your requirements

Posted in Installation, Oracle Solaris 11 | Tagged , , | 1 Comment

An efficient reply

While messing about (if you notice, that’s one phrase that I come back to often in my posts, it’s basically how I enjoy learning and testing new things, messing around in a test environment sandbox, breaking things to see how they work, and figuring out ways to put them back together again 🙂 ) with Oracle’s TDE (Transparent Data Encryption) feature , I did some cross-referencing on various Oracle articles on the MOS (or Metalink to some) portal.

Among these, I came across one document which basically stated that if you have encrypted data with TDE, and you have a shutdown immediate command run on the database while there are active transactions, followed by a loss of the encryption wallet, you will not be able to re-open the database again, due to Oracle being unable to perform instance recovery after the shutdown. This seemed odd to me, as I had coincidentally tried the same sort of tests to see how resilient to failure this sort of setup would be.

So I dropped Oracle support a quick note, detailing my reservations, providing my findings and test cases, and thought no more of the matter. A nice surprise then, to receive the following in my inbox shortly after:

…We have changed Note [document ID redacted] as per the remarks you have created a couple of days ago. We clarified that this issue will happen only if there is a need for a crash recovery and we have also updated the note with the messages that can be seen in the alert.log of a 11.2.0.3 database in these circumstances. Please let us know whether you find the new clarifications sufficient.

Well done, Oracle Support team, to have not only looked through my concerns, but also run a quick test of the issue I highlighted, verified and also modified the official article in such a short time. I guess they take this sort of thing seriously, unlike some other principals/vendors I’ve heard of 😉

PS. I’m obviously not including the MOS document ID and Oracle support contact person’s details in the post, as I don’t want to get into trouble with their vaunted legal department 🙂

Posted in Database security, General, Oracle 11g Release 2 | Tagged , , , | Leave a comment

Backing up tables/tablespaces/databases encrypted with TDE in Oracle 11g

In a previous post, I was messing about with TDE (Transparent Data Encryption) in Oracle 11g, and with both the column-level and also tablespace-level variants. While pretty simple to understand and start exploring (make no mistake, there’s much to cover if you plan serious study), there are many other considerations that are worth thinking about when using this security feature, for example:

  1. What sort of data is protected:
    data at rest (within data files/temporary tablespaces, yes)
    data in motion (data that is transmitted over the network, no, without also using the Additional Security Option or ASO)
  2. What sort of performance impact/deterioration can I expect on my database:
    queries reading from encrypted tables (decryption operations)
    SQL statements modifying/inserting table rows (encryption operations)
  3. How does using TDE effect my backup and restoration procedures?

And probably some others I haven’t thought of this early in the morning 😉 But for me, the primary concern was point #3 (after all, if you are looking into TDE/ASO, you probably have some pressing security concerns that override all else), since a comprehensive backup strategy is probably the single most important task for any live, production database.

But before delving into backups, let’s have a quick look at the worst case scenario, or what happens when an existing TDE environment suffers from a loss of the encryption wallet.

First, I will physically copy the encryption key to another location, and then simulate a loss by deleting the original file.

Now let’s try some regular operations on the database, namely:

  1. selecting data from an encrypted table
  2. inserting data into an encrypted table
  3. creating a new table in an encrypted tablespace
  4. shutting down the database normally
  5. backing up the database with RMAN

So far, so good, we’re still able to manipulate data in our encrypted tables/tablespaces, backup our database with RMAN (ignore the embarrassing archived log deletion policy message, I was tinkering with various settings earlier). Apparently it doesn’t really matter what happens to our encryption wallet, right? Well, lets see what would happen at this point if we decided to shutdown our database (or if there was an unexpected failure to the instance)

While the ORA-28365 error is prompted, the database is still able to open successfully in READ WRITE mode, and the following entry is seen in the database alert log:

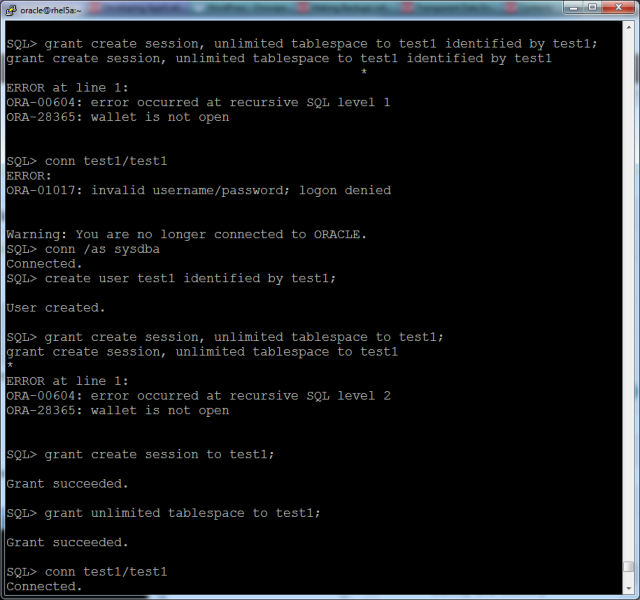
At this point, let’s try to create a new user as well, as an additional test

Some strangeness in the outcome, but it looks like we were able to create the user in the end, and the TEST1 user is able to connect to the database normally. Let’s re-run the earlier tests again, to be sure.

Just for completeness, I’ve attempted to open the encryption wallet (which is obviously going to fail, since I deleted it earlier). So now that we are not able to access our secure data, we might want to ensure we at least have a current database backup, especially if we suspect media/storage failure caused the wallet to become unavailable in the first place.

The situation has just gotten more ominous, as we now are not able to run a full RMAN database backup anymore. We could resort to either performing an old-fashioned offline manual backup (which involves downtime), or exclude the affected tablespaces (which would not make sense, since they are supposed to contain our valuable secure data in the first place).

In case there were only a few tables that are actually vital, we might try to rescue these tables by using either Datapump or the obsoleted export utilities, as seen below:

So that’s not going to work either, from the messages shown above. Incidentally, Oracle’s MOS (MyOracleSupport, previously known as Metalink) has several documents related to this scenario, which basically say you either

  1. restore the wallet from a backup (assuming the encryption key has not been modified after the last backup) OR
  2. restore the database to a time before the encryption key was modified, along with the backup wallet

As for the Oracle wallet, as it is not being actively written to (unlike the online redo logs, for example), it is safe to perform a simple, OS-level backup, for example using the cp command:

cp /oracle/wallet/ewallet* /oracle/backup/ocmdb

A simple step like this will save you hours of aggravation, and potential data loss if the database is unable to locate the required wallet.

Posted in Backup and recovery, Database administration, Database security, Oracle 11g Release 2, Oracle errors, Recovery Manager (RMAN), Transparent Data Encryption, Uncategorized | Tagged , , , , , | Leave a comment

Objective: Create an encrypted Oracle 11g tablespace with Transparent Data Encryption (TDE)

Transparent Data Encryption (or TDE) is a feature that was introduced (column level TDE starting in 10g Release 2, tablespace-level TDE starting with Oracle 11g Release 1) to allow the safe storage of sensitive data (common examples would be financial information, such as credit card numbers) within a tablespace, that is transparently decrypted for users with access. And let’s not forget about the data at rest (e.g, physically stored within the database data files), this will need to be secured as well.

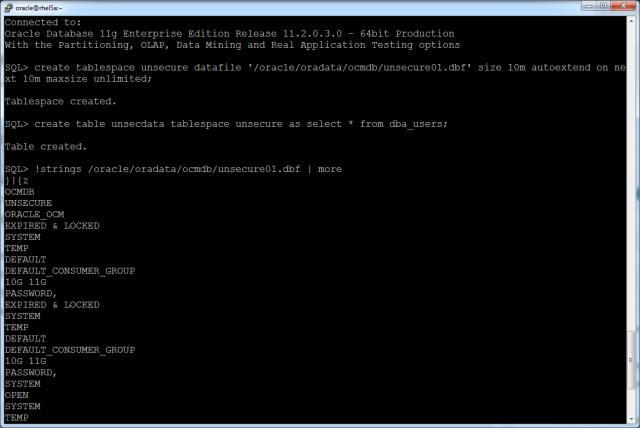
The basic idea behind this concept is to simplify the secure storage of data within the Oracle database, which also includes the data within the physical data files itself. As a simple example, let’s say I create a normal (smallfile) tablespace, and populate it with some sample data, as follows:

As seen above, with some very simple OS-level commands, it is possible for me to view all the data that is stored within the Oracle database file. This would also be the case if I were to run the same command against the database temporary tablespace tempfiles. Let’s now look at how TDE can help remedy this situation (for the purposes of this sample, I will only be looking at tablespace-level TDE, not columnar TDE, which is another option available).

Before starting to use TDE, the administrator must first create a wallet (security credentials for Oracle components such as database, application server and Oracle Identity Management infrastructure). It is recommended to specify a separate wallet just to store the wallet information for TDE, and this is what I will be doing.

First, add the entry ENCRYPTION_WALLET_LOCATION, pointing to a valid directory, in the sqlnet.ora file (located by default in $ORACLE_HOME/network/admin) as shown below:

ENCRYPTION_WALLET_LOCATION=(SOURCE=(METHOD=FILE)(METHOD_DATA=(DIRECTORY=/oracle/ wallet)))

Next, I will create the actual wallet itself, by using either SQLPlus (now that the location has been defined), or the orapki and mkstore command-line tools:

SQLPlus:

SQL> alter database set encryption key identified by “oracle123”;

orapki command line tool:

[oracle@/oracle/wallet, SID=db11g]orapki wallet create -wallet /oracle/wallet -pwd oracle123 -auto_login_local

Note that I have specified the auto_login_local clause with the orapki tool, meaning that this wallet will automatically be opened when the database is started, and will only be valid for use in the current host. For additional security, this option can be disabled.

mkstore command line tool:

[oracle@/home/oracle/scripts, SID=ocmdb]mkstore -wrl /oracle/wallet -create Oracle Secret Store Tool : Version 11.2.0.3.0 – Production Copyright (c) 2004, 2011, Oracle and/or its affiliates. All rights reserved.

Enter password:
Enter password again:

The mkstore command allows us to create the encryption key without specifying a clear text password on the command line, which is always welcome. This way, if someone were to be running a simple ‘ps -ef | grep oracle’ command on the same server, they would not see the database encryption password that I specified when creating the wallet.

Now if I navigate to the /oracle/wallet directory, I will see the related files:

[oracle@/oracle/wallet/testwallet, SID=db11g]pwd /oracle/wallet [oracle@/oracle/wallet/testwallet, SID=db11g]ls cwallet.sso  ewallet.p12

[oracle@/oracle/wallet/testwallet, SID=db11g]orapki wallet display -wallet /oracle/wallet/testwallet/ Oracle PKI Tool : Version 11.2.0.3.0 – Production Copyright (c) 2004, 2011, Oracle and/or its affiliates. All rights reserved.
Requested Certificates: User Certificates: Trusted Certificates:
Subject:        OU=Class 1 Public Primary Certification Authority,O=VeriSign\, Inc.,C=US Subject:        OU=Class 3 Public Primary Certification Authority,O=VeriSign\, Inc.,C=US
Subject:        OU=Class 2 Public Primary Certification Authority,O=VeriSign\, Inc.,C=US Subject:        OU=Secure Server Certification Authority,O=RSA Data Security\, Inc.,C=US
Subject:        CN=GTE CyberTrust Global Root,OU=GTE CyberTrust Solutions\, Inc.,O=GTE Corporation,C=US

Now let us retry the test from earlier, but this time with a tablespace that has TDE enabled:

As can be seen from the example above, the data within the  tablespace itself is encrypted now and no longer stored as plain text.

It’s also possible to encrypt an existing table’s column based on created encryption wallet, with some caveats, as shown below:

The SQL statement has clearly been processed successfully, but the data within the tablespace datafile itself has not been encrypted (note the usernames still clearly being displayed within the table). An Oracle bug, perhaps? Not at all, as it turns out. While the documentation clearly tells you how to encrypt an existing column, what it rather disingeniously mentions only in passing is to say is that the changes, like any other DML statement, will only be written when the buffer cache is flushed and written to disk by the DBWR process.

So here, if I wanted to make the changes immediate, what I would have to do flush the buffer cache manually, and then try it again, like so:

An additional note, if you attempt to select from a table that references an encryption wallet, while that wallet is not opened,  the SQL statement will fail with an error as show below (here I re-created an encryption wallet within SQLPlus itself, as well as a new table for my test purposes)

Finally, and perhaps MOST important, once you have objects that have been encrypted with TDE, the wallet becomes a vital part of your database, without which even standard database maintenance operations (startup/shutdown) might be compromised, hence a regular backup schedule should be included into standard management procedures.

Posted in Database administration, Database security, Transparent Data Encryption | Tagged , , , , | 1 Comment

Objective: Moving DEDICATED SERVER database to SHARED SERVER

Now that I’m back from the festive break, I was messing about with some basic configuration settings/tests to keep myself sharp. One of the things that popped up (other than some basic network stuff like connect-time failover, service resolution preference, access control lists, etc) was another seemingly simple (yet easily forgotten, if you’ve not done it for a while) task of moving an Oracle database from a dedicated server (the default setting) to shared server mode.

Before I get into this, it would be helpful (not least to myself) to understand what is meant by both these terms (please note that I’m paraphrasing here, do refer to the full documentation for the exact definition). A dedicated server database indicates that for every client connection to the database (here the client could be an application, an API that collects data from the database, or even another remote database), a corresponding process (called a server process) is exclusively dedicated to it, and remains active as long as the client is connected to the database.

A shared server database on the other hand has a collection of these server processes that are not exclusively owned by a client connection to the database, but instead are shared among all the current connections to the database, as needed. By utilizing another process called a dispatcher (only present in shared server databases), all connections/SQL statements are routed to an available server process in the shared server pool. Conversely, if a client is idle, this server process is detached and available to service new client requests.

The upshot of all that is, for a database which has many long-running processes, that are always active, and disconnect as soon as the process is complete, there may not be much improvement from implementing shared servers (the opposite may in fact be true).

But imagine a database where the workload is typically sporadic, with long periods of inactivity, even though the client connection to the database is maintained. In this sort of scenario, whereas a dedicated server database would have 1 active server process created for each client connection, a shared server configuration would allow the work to be distributed efficiently between the pool of shared servers, and not unnecessarily consume server resources (CPU, memory).

So lets have a look how it works, with a simple example in Oracle 11g.

Based on the output above, we can see that the database has a value of 202 set for the SESSIONS parameter, and there is no shared servers configured (as seen by the SHARED_SERVERS and DISPATCHERS parameters).

So the first thing I would need to do is set a value for these two parameters, I will go with 20 for SHARED_SERVERS (based on a general guideline of 20-30 per 500 sessions), and leave the DISPATCHERS parameter null to start with.

The next step would be to examine the TNS NAMES entry for the database, specifically the CONNECT_DATA portion, as shown below:

DB11G =  (DESCRIPTION=
(SDU=32767)   (SEND_BUF_SIZE=2092500)   (RECV_BUF_SIZE=2092500)   (ADDRESS_LIST=
(ADDRESS=(PORT=1525)(HOST=192.168.116.10)(PROTOCOL=TCP))
(ADDRESS=(PORT=1521)(HOST=192.168.116.10)(PROTOCOL=TCP)))   (CONNECT_DATA=(SERVICE_NAME=DB11G)(SERVER=DEDICATED)))

There is an explicit SERVER=DEDICATED clause that specifies a dedicated connection for all clients using this local naming entry. We can further verify this by querying the SERVER column for the dynamic view V$SESSION:

Next, I will modify the TNSNAMES entry to use a SERVER=SHARED clause (shown below), and verify the connections to the database.

DB11G =  (DESCRIPTION=
(SDU=32767)   (SEND_BUF_SIZE=2092500)   (RECV_BUF_SIZE=2092500)
(ADDRESS_LIST=
(ADDRESS=(PORT=1525)(HOST=192.168.116.10)(PROTOCOL=TCP))
(ADDRESS=(PORT=1521)(HOST=192.168.116.10)(PROTOCOL=TCP)))   (CONNECT_DATA=(SERVICE_NAME=DB11G)(SERVER=SHARED)))

After the change has been made, I can now connect to the database again, and run the query against V$SESSION again, as shown below:

Note here that Oracle automatically creates a dispatcher (mentioned earlier), even though I have not explicitly changed the value of the DISPATCHERS parameter. This demonstrates the automatic shared server configuration feature that was introduced starting with Oracle 10g.

Of course, for real production environments, you would like to control all of these factors yourself, and take into consideration several other parameters as well, including:

1. MAX_SHARED_SERVERS = maximum number of shared server processes that can run concurrently (can be overridden by the SHARED_SERVER parameter, as shown below)

There will however be an associated warning logged in the alert log, as seen below:

Thu Jan 05 09:17:18 2012 Warning: MAX_SHARED_SERVERS (10) < SHARED_SERVERS (20)
ALTER SYSTEM SET max_shared_servers=10 SCOPE=BOTH;

2. SHARED_SERVER_SESSIONS = the total number of shared server sessions that can run simultaneously, setting this lower than the SESSIONS parameter allows some DEDICATED connections to be reserved to the database, in my case I set a value of 195

3. DISPATCHERS = set the number of dispatcher processes explicitly, roughly 1 dispatcher for every 50-100 sessions, eg in my case, for 202 SESSIONS, I set a value of 4 dispatchers

The query above also shows that the 4 dispatchers have been started as required, and are currently waiting for connections.

4. MAX_DISPATCHERS = the maximum number of dispatchers that can run simultaneously (similar to the MAX_SHARED_SERVERS parameter, this can also be overriden by the value set for the DISPATCHERS parameter, as shown below)

Thu Jan 05 11:21:56 2012 Warning: MAX_DISPATCHERS (3) < total dispatchers (4) ALTER SYSTEM SET max_dispatchers=3 SCOPE=BOTH;

Note: To revert back to the DEDICATED server settings, just set the SHARED_SERVERS and DISPATCHERS parameters to 0 and null (”) respectively. The idle dispatchers will eventually be terminated.

Ensure that you also edit the TNSNAMES entry for the database to use the clause SERVER=DEDICATED, or will receive an error as follows:

ERROR: ORA-12520: TNS:listener could not find available handler for requested type of server

Posted in Database administration, General, Listener administration, Network configuration, Oracle 11g Release 2, Oracle Net Services configuration, Uncategorized | Tagged , , , , , | Leave a comment

WIP – Configuring Oracle 11g Release 2 RAC on Windows Server 2008

In order to install Oracle RAC on Windows, there are several components that need to be prepared first. As usual with these sort of installations, it can sometimes seem that the time spent on preparation of the environment is longer than the time required to setup the Oracle RAC configuration itself.

For my test installation, I will be running 2 virtual machines (VMs) on my VMWare ESX 4.1 server, and also a third VM to serve as my virtual storage server. Finally, I already have a DNS server that was created earlier, running on Windows Server 2008 as well (highly recommended to use a DNS server for Oracle RAC, but not mandatory). I will also be using 3 IPs on the physical network for the SCAN (Single Client Access Name), which will need to be registered on a valid DNS server (as do the public IPs and VIPs). The details are as follows:

Hostname IP Address (public) IP Address (private)   IP Address (VIP  
win2k8_1 192.168.0.61 10.0.0.61   192.168.0.66  
win2k8_2 192.168.0.62 10.0.0.62   192.168.0.67  
openfiler 192.168.0.60 NA   NA  
myd 192.168.0.20 NA   NA  
winrac-scan 192.168.0.63192.168.0.64192.168.0.65 NA   NA  

So, in terms of hardware, each of my Windows Server machines will have:

  1.        40Gb of hard disk space
  2.        2 network interface cards (1 for the private interface, 1 for the public interface)
  3.        2 Gb of RAM installed

As for the software required for this installation, I will be using:

  1.        Openfiler Open Source Storage Management software
  2.        Windows Server 2008 Release 2
  3.        Oracle 11g Release 2 (11.2.0.3) Grid Services
  4.        Oracle 11g Release 2 (11.2.0.3) RAC Database software
  5.        Existing Windows Server 2008 DNS server (configuration not shown)

Oracle RAC installation overview:

  1.        Install the Windows Server 2008 operating system on 2 servers (either physical or virtual machines)
  2.        Install Openfiler storage management software (not shown) and configure iSCSI storage for Oracle RAC
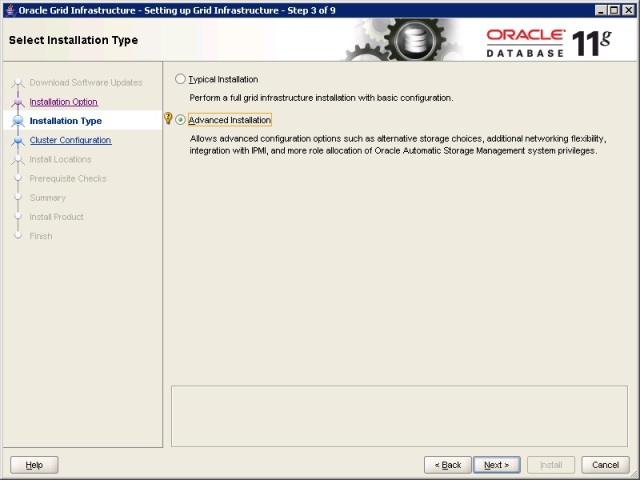
  3.        Install Oracle Grid Services and configure cluster
  4.        Install Oracle database software and configure Oracle RAC database


The first step will be to provision 2 virtual machines and install the Windows Server 2008 operating system. The steps are outlined in brief here (for my test setup I’m using 2 virtual machines, but 2 physical desktop machines/servers will serve just as well). In my case,  I will start the installation from the VMWare ESX console, and proceed step by step.

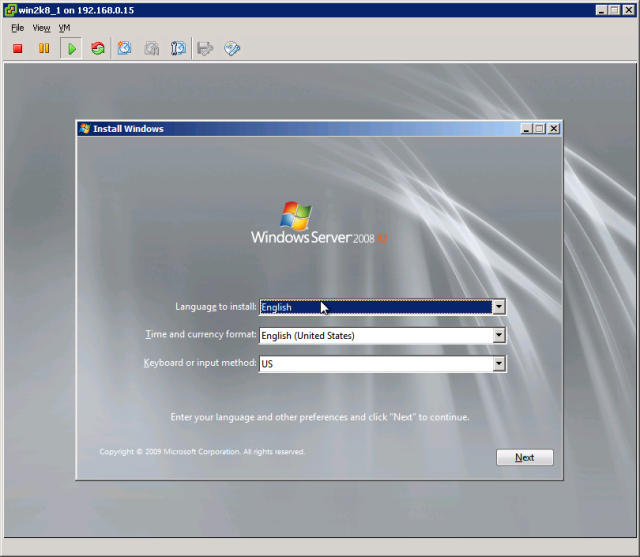
Select a language, currency and time format, as well as preferred keyboard input layout for the Windows Server 2008 installation. I will be using the default US English settings for the test setup.

Accept the license agreement as mentioned above (however, for my test purposes I do not have a license available, and will delete the VMs within 3 days)

And we’re off! After the installation has been running for a while, we will be prompted to provide additional information, as shown below:

The desired location of the installation (the relevant hard disk or disk partition)

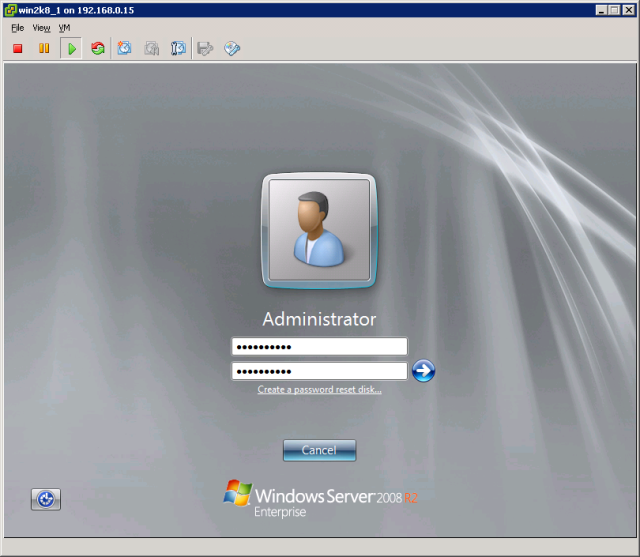
After a relatively brieft period of uncompressing the installation files, and performing the actual installation itself, you will be presented with a logon screen, as shown below..

Just provide whatever (hopefully secure) password you would like to use, and the OS installation part of the RAC setup is complete.

Now I am able to login to the OS and start on the actual preparation for our Oracle RAC cluster.

The first thing I will do is setup the network connections on both the Oracle RAC nodes, here I am using the TCP/IP (IPv4) protocol, and not enabling IPv6.

Next I am setting the physical IP address (for the public interface as shown in the screenshot) based on the list of IPs that I decided on before starting the installation process itself (refer to the table at the beginning at this post). The exact step will be repeated on each of the RAC nodes, with the appropriate IP addresses.

Finally, once I have done the necessary IP address configurations for the public and private IPs on both servers (not shown), I will rename the network interfaces itself to easily identify which connection they provide, either the public connection to the RAC cluster (public), or the private interconnect between RAC nodes (private). I find this helps not only to avoid confusion, but also is useful in any failure testing later on (manually disable network interfaces and see how the RAC cluster copes with the failure).

Before moving forward, please ensure that not only are you able to ping across all nodes (eg from node1 to node2 and vice versa), but also ensure that the DNS server in your environment has been updated with the public, VIP and SCAN IP address for all the nodes in your cluster (not shown here).

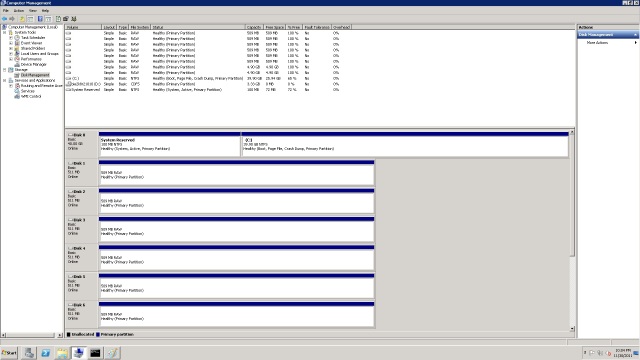
Next I will start with the disk or storage configuration for the Oracle RAC cluster. I have already configured a disk volume group to be used for the Oracle RAC installation on my existing Openfiler server (not shown), and this will provide the shared the iSCSI disks used by the RAC database (and associated ASM instances). I will also use one of these iSCSI devices to create the ACFS shared filesystem later on in this guide.

To start off, I will identify the IP address of the iSCSI target (or portal) that contains all of the iSCSI devices, and specify the port number for the connection (by default, all iSCSI connections will use port 3260, unless explicitly configured otherwise). To get to this configuration window, you just need to go to the Windows Server 2008 start menu, click on the ‘Run’ window, and type iscsi initiator which will give you the menu shown above.

Note: Here it is also possible to enable multipathing for the iSCSI devices, by selecting the ‘Advanced’ button, and choosing to enable multipathing support for the iSCSI target being configured.

NOTE: This post will be a bit delayed, as I have several things to work on right now, but I will start by posting all the screenshots for the entire installation, and continue to fill them out with details and descriptions as time permits. Do bear with me in the meantime >.>

Posted in Configure with Grid Control, Create ASM diskgroup, Create RAC database, Install Grid Infrastructure, Install Grid Infrastructure, Install Oracle database software, Oracle 11g Release 2 | 3 Comments

RHEL 5 – cannot join as standalone machine

I received this error when attempting to join my DNS server (myd.innotiiveasia.com, IP 192.168.0.20 running on Windows Server 2008) from my RHEL 5.5 machine (rhelrac2.innotiiveasia.com, IP 192.168.0.52). After initially thinking it could be due to my Kerberos configurations, a more simple solution came to mind, what if my /etc/hosts file itself is not configured correctly?

As I have not yet joined the domain, does my hostname currently match the settings I’m trying to configure (for example in the /etc/krb5.conf file)? Turns out, it was my Samba configuration file (/etc/samba/smb.conf) all along, which had not been copied over from the initial setup on the Oracle Cloud Control machine. One quick scp later and everything was resolved:

[root@rhelrac2 ~]# more /etc/samba/smb.conf | grep realm
default_realm = INNOTIIVEASIA.LOCAL
dns_lookup_realm = yes

[root@rhelrac2 ~]# more /etc/hosts | grep rhelrac2
192.168.0.52            rhelrac2.innotiiveasia.local rhelrac2

[root@rhelrac2 ~]# net ads join -U administrator
administrator’s password:
Using short domain name — INNOTIIVEASIA
Joined ‘RHELRAC2’ to realm ‘INNOTIIVEASIA.LOCAL’

Posted in DNS configuration, DNS configuration, Join Windows Server domain, Join Windows Server domain, Oracle Linux 5, OS error messages, RHEL 5, RHEL/OEL error messages | Tagged , , , | 2 Comments

RHEL 5 – kinit(v5): Clock skew too great while getting initial credentials

Recently, when trying to set up an Oracle RAC environment in my test servers, I came across this error while trying to register my RHEL machines on the Windows Server 2008 server. The first thought that came to mind was immediately that I had not configured the NTP services for Linux, which are after all responsible for time synchronization.

So the first thing I did, after reproducing the error on the rest of my future RAC nodes was to check if I had in fact configured the NTP daemon on the server (was it installed, and was it running).

[root@rhelrac4 ~]# kinit ADMINISTRATOR@INNOTIIVEASIA.LOCAL
Password for ADMINISTRATOR@INNOTIIVEASIA.LOCAL:
kinit(v5): Clock skew too great while getting initial credentials

[root@rhelrac4 ~]# yum install ntp
Loaded plugins: rhnplugin, security
This system is not registered with RHN.
RHN support will be disabled.
Setting up Install Process

Package ntp-4.2.2p1-9.el5_4.1.x86_64 already installed and latest version
Nothing to do

[root@rhelrac4 ~]# chkconfig –list | grep -i ntp
ntpd            0:off   1:off   2:off   3:off   4:off   5:off   6:off

So from here I could see that the NTP daemon was not only installed, but it was disabled. Simple enough, now all I had to do was enable it, and perhaps reboot the server to see if this solved matters:

[root@rhelrac4 ~]# chkconfig ntpd on
[root@rhelrac4 ~]# reboot

Unfortunately, even after restarting this machine, the same error was still occurring. So now, after some research, I found that I would need to run an initial configuration(or to be precise, synchronization) of the dates on my Linux machine with another, reliable and accessible server. I chose to use the DNS server itself (with the IP of 192.168.0.20), as I would be using it to maintain the DNS records for all of my RAC nodes.

So first I will be starting the NTPD service, then checking the date, updating the date settings against the DNS server, confirming the change, and finally testing to see if the problem is resolved.

[root@rhelrac4 ~]# service ntpd start
Starting ntpd:                                             [  OK  ]
[root@rhelrac4 ~]# date
Wed Nov  2 15:52:07 MYT 2011

[root@rhelrac4 ~]# ntpdate -u 192.168.0.20
2 Nov 15:39:37 ntpdate[7948]: step time server 192.168.0.20 offset -751.194050 sec
[root@rhelrac4 ~]# ntpdate -u 192.168.0.20
2 Nov 15:39:38 ntpdate[7949]: adjust time server 192.168.0.20 offset 0.012507 sec
[root@rhelrac4 ~]# ntpdate -u 192.168.0.20
2 Nov 15:39:38 ntpdate[7950]: adjust time server 192.168.0.20 offset -0.000911 sec

[root@rhelrac4 ~]# date
Wed Nov  2 15:39:40 MYT 2011

And finally to end back where I started, retry the initial kinit command and verify that there are no more error messages:

[root@rhelrac4 ~]# kinit ADMINISTRATOR@INNOTIIVEASIA.LOCAL
Password for ADMINISTRATOR@INNOTIIVEASIA.LOCAL:

Posted in OS error messages, RHEL/OEL error messages, Update date settings (NTP), Update date settings (NTP) | Tagged , , , , , | Leave a comment

Adding Linux 5 machine to Windows Server 2008 DNS

In order to add a Linux machine to an existing Windows Server 2008 DNS server, there are several main steps that need to be carried out:

  1. Prepare the Linux servers to join the Windows DNS configuration (this includes installing required packages, editing configuration files, checking hostname resolution, configure Kerberos and Samba, etc)
  2. Add the DNS entries for the Linux machine to the Windows Server 2008 DNS configuration (both forward looking and reverse lookup zones)
  3. If necessary, create a new reverse lookup zone in the Windows Server 2008 configuration

The main goal of this exercise is for me to be able to add all of my Linux (both RHEL and OEL servers) virtual machines to the DNS configuration, in order for me to test out various deployment and failover testing scenarios for Oracle 11g Release 2 RAC, Oracle 12c Cloud Control, and also data replication with Oracle Goldengate (all hopefully subjects of future entries in this blog). Explaining the different components involved as well as what their function is within Linux and Windows Server is not the goal of this entry.

So what I do NOT need are things such as :

  1. authentication for Windows Active Directory users on my existing Windows Server 2008 when accessing Linux machine
  2. home directory and file sharing between platforms, and so on

Basically, all I need is DNS membership and host/IP address resolution features, and will not be going into detail on any of the other DNS/Active Directory settings. So if this is what you need, the following entry isnt going to be of much use.

So, to start off, I will need to install the required packages (updated based on this helpful post) on my Linux machine running on RHEL 5.5. I have already configured YUM in a previous post, so I’ll just dive right into it:

Package list:
samba3x.x86_64
samba3x-common.x86_64
samba3x-winbind.x86_64
samba-common
samba-client
samba
system-config-samba
pam_krb5
krb5-workstation
krb5-libs


[root@rhelgrid yum.repos.d]# yum list | grep system-config-samba
This system is not registered with RHN.
RHN support will be disabled.

system-config-samba.noarch                1.2.41-5.0.1.el5           el5_u5_base

[root@rhelgrid yum.repos.d]# yum install system-config-samba
Loaded plugins: rhnplugin, security
This system is not registered with RHN.
RHN support will be disabled.

Setting up Install Process
Resolving Dependencies
–> Running transaction check
—> Package system-config-samba.noarch 0:1.2.41-5.0.1.el5 set to be updated
–> Finished Dependency Resolution

 Dependencies Resolved
 ================================================================================
Package                                   Arch            Version                   Repository                         Size
=================================================================================

Installing:
system-config-samba         noarch        1.2.41-5.0.1.el5         el5_u5_base                   218 k

Transaction Summary
==================================================================================
Install       1 Package(s)
Upgrade       0 Package(s)

Total download size: 218 k
Is this ok [y/N]: y

Downloading Packages:
system-config-samba-1.2.41 5.0.1.el5.noarch.rpm                               | 218 kB     00:01

Running rpm_check_debug
Running Transaction Test
Finished Transaction Test

Transaction Test Succeeded

Running Transaction
Installing     : system-config-samba                                                      1/1

Installed:
system-config-samba.noarch 0:1.2.41-5.0.1.el5
Complete!

NOTE: The above example was for the system-config-samba package, but the steps are the same for all the packages in the above list, so I will skip the complete list of RPM installations for brevity


Next, I will verify the entries in the /etc/hosts file, to ensure that the fully qualified host names (FQDN) are specified (note that my DNS server is named MYD, with the IP address of 192.168.0.20 and also the fully qualified name including my domain)

 [root@rhelrac1 yum.repos.d]# more /etc/hosts
# Do not remove the following line, or various programs
# that require network functionality will fail.
127.0.0.1                  localhost.localdomain localhost
192.168.0.51            rhelrac1.innotiiveasia.local rhelrac1
192.168.0.52            rhelrac2.innotiiveasia.local rhelrac2
192.168.0.53            rhelrac3.innotiiveasia.local rhelrac3
192.168.0.54            rhelrac4.innotiiveasia.local rhelrac4
192.168.0.55            rhelgrid.innotiiveasia.local rhelgrid
192.168.0.20            myd.innotiiveasia.local myd

Now to check that my DNS server has been specified, and the Linux machine knows to use DNS-based host resolution (by editing the /etc/resolv.conf and /etc/nsswitch.conf files respectively)

Note that I have created an entry for the DNS server (or the nameserver) in the resolv.conf file, with the correct IP address specified:

[root@rhelgrid yum.repos.d]# more /etc/resolv.conf
nameserver 192.168.0.20

And in my /etc/nsswitch.conf file, I have specified that the host name resolution should include both the hosts entries, as well as the DNS server configurations, as shown in the following lines:


[root@rhelgrid pam.d]# more /etc/nsswitch.conf | grep dns
#       dns                     Use DNS (Domain Name Service)
#hosts:     db files nisplus nis dns
hosts:      files dns

Now we are ready to configure the Kerberos daemon to connect to the Windows DNS server zone (or realm, in Kerberos terms), as well as test connectivity between our Linux machine and the DNS server. First, we need to edit the configuration file (/etc/krb5.conf) to include the entries as shown below:

[root@rhelgrid yum.repos.d]# more /etc/krb5.conf

[libdefaults]
default_realm = INNOTIIVEASIA.LOCAL
dns_lookup_realm = yes
dns_lookup_kdc = yes
ticket_lifetime = 24h
forwardable = yes

Here, the main section is the realm/DNS zone definition, as shown in the stanza above. Additional configurations (such as application defaults, logging, etc) is not shown for brevity. As can be seen, I’m specifying my domain name as INNOTIIVEASIA.LOCAL (all in uppercase, as this is a requirement). To test the settings supplied, we can now do the following:

[root@rhelgrid yum.repos.d]# kinit ADMINISTRATOR@INNOTIIVEASIA.LOCAL
Password for ADMINISTRATOR@INNOTIIVEASIA.LOCAL:

If everything is working correctly, there will be no messages/errors returned. If there are any messages displayed, the previous configuration files may not be accurate. We can now join the domain by running the following:

[root@rhelgrid samba]# net ads join -U administrator
Enter administrator’s password:
Using short domain name — INNOTIIVEASIA
Joined ‘RHELGRID’ to realm ‘innotiiveasia.local’

[NOTE: As mentioned earlier, it’s important to ensure that the configuration has been done correctly in the Kerberos, hosts and nsswitch files, or you may encounter errors such as shown below:
[root@rhelgrid samba]# net ads join -U administrator
Enter administrator’s password:
Using short domain name — INNOTIIVEASIA
Joined ‘RHELGRID’ to realm ‘innotiiveasia.local’
No DNS domain configured for rhelgrid. Unable to perform DNS Update.
DNS update failed!

Once all the requirements have been completed (in my case I had made a mistake in the /etc/hosts file), this should no longer be a problem]

Moving on to the Windows Server 2008 machine, we can now see that an entry has been created for our Linux host (in my case, rhelgrid) on the DNS server’s forward lookup zone:

Windows Server 2008 DNS entry

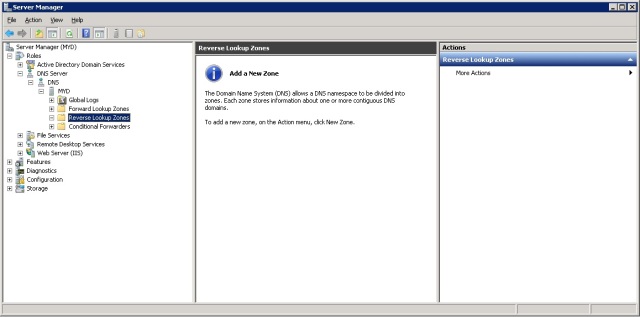
So we’re almost done, all that remains is to ensure that we have a reverse lookup domain configured and working, so that not only will our servers be able to resolve fully qualified hostnames, but also the IP addresses for all the hosts in our DNS configuration. From here on, these steps will be on the Windows Server 2008 machine, as the administrator user (or other similar users with administrator privileges).

If you’re following the screenshots above, everything should be fairly self-explanatory, but the general idea is I have a domain with the IP configuration of 192.168.0.XX, and thus my reverse-lookup domains will start with 0.168.192.XX. I have elected to enable this reverse lookup zone only for IPv6 addresses (as we do not use IPv6 in our test environments, for now).

The last step is to add the pointer to my Linux server (rhelgrid.innotiiveasia.local, IP 192.168.0.55) to the reverse lookup zone, and test the functionality from our Linux box. Again the steps are carried out on the Windows Server 2008 machine, and are fairly self-explanatory.

In brief, what I’ve done here is configured a pointer for the reverse lookup zone in our DNS server, and added a pointer (or entry) for the rhelgrid machine that has already been registered in the forward lookup zone earlier in this post (when we added the host with the net join ads command). Now it should be possible to perform both forward and reverse DNS lookups from the Linux server, as shown below:

[root@rhelgrid etc]# nslookup rhelgrid.innotiiveasia.local
Server:         192.168.0.20
Address:        192.168.0.20#53
Name:   rhelgrid.innotiiveasia.local
Address: 192.168.0.55

[root@rhelgrid etc]# nslookup 192.168.0.55
Server:         192.168.0.20
Address:        192.168.0.20#53
55.0.168.192.in-addr.arpa       name = rhelgrid.innotiiveasia.local.

Posted in Adding Linux hosts, Configure reverse lookup DNS zone, DNS configuration, DNS configuration, DNS configuration, Join Windows Server domain, Join Windows Server domain, Windows Server 2008 | Tagged , , , , , | 1 Comment